Jun 30, 2009

Girl & Music

Here's my new design, Girl & Music Blogger template. Check the screenshoot here. Simply design, but you can customize as you want.


-------------------------------------------------
THE CONTENTS OF THIS TEMPLATE IS MADE BY CEBONG IPIET.
PLEASE BE RESPECTFUL AND DO NOT REMOVE CREDIT FOOTER LINK WITHOUT MY PERMISSION.
YOU ARE ALLOWED TO DISTRIBUTE BUT NOT ALLOWED TO ADD ANY LINK ON FOOTER

Jun 21, 2009

How to Create Multicolumn Labels/Categories ?

Usually we use default labels/categories blogger widget. But if there's too many labels, it become too long. There's three tricky option to simplify labels widget.
  1. Create multicolumn labels. You can see the example at my sidebar. Divide labels become two column
  2. Use scrolling option
  3. Use dropdown option
Now we try to make multicolumn labels only using CSS. No need heavy loaded- javascript as tag cloud widget. Suggested to make new section. Create section for labels and then put before footer. Why we should create new section? If we set multicolumn on sidebar, it will impact to another list widget.

The point is, create 4 column labels in lower section. You can preview the example here

Here's how to

Open Edit HTML and Create CSS code

1. Copy these CSS code below and paste before ]]></b:skin>

#category-wrapper {
width:960px;
clear:both;
margin:0 auto 10px;
padding-top:15px;
line-height: 1.6em;
text-align:left;
border-bottom:1px solid #efefef;
}

.cat {
color: #000000;
line-height: 1.5em;
}

.cat ul {
list-style:none;
margin:0 0 0;
padding:0 0 0;
}
.cat ul li {
float:left;
width:22%;
list-style-type: none;
margin: 0 0 5px;
padding-left: 15px;
background:url(https://blogger.googleusercontent.com/img/b/R29vZ2xl/AVvXsEj_w8WszkdatX2-Pn-r27sgjoACbSOnmeR4HctWgdpCfvCWN2btG6VdYolOp8QG4LN6F3WZJQf0fKUxE6xpfAzIKGyWuhekD46MQUqVMqqKsaoHalT-GMCZiwOuauhyphenhyphenVOL41OYGBGdywnk/s320/li.gif) no-repeat left center;
}

.cat .widget {
border-bottom:1px dotted #F7F7F7;
margin:0 .5em 1.5em .5em;
padding:0 0 1.5em;
}


Note :
#category-wrapper {
width:960px; adjust this value to your current template size

.cat ul li {
float:left;
width:22%; adjust this value, If you want to make two column set to about 45% , make three column set to about 33% .

2. Copy these code below

<div id='category-wrapper'>
<b:section class='cat' id='cat'>
<b:widget id='Label1' locked='false' title='Categories' type='Label'/>
</b:section>
</div>


Paste before

<div id='footer-wrapper'>


Save Template


Now you've created special wrapper for Labels widget

Thanks to Herro

Baby Shop

Introducing, my another baby template. Baby Shop Blogger template, suitable for baby shop blog, baby clothes blog, baby blog, etc. Featuring unique header and footer image. Here's the screenshoot


You can PREVIEW and DOWNLOAD it for free

Installation and Setting
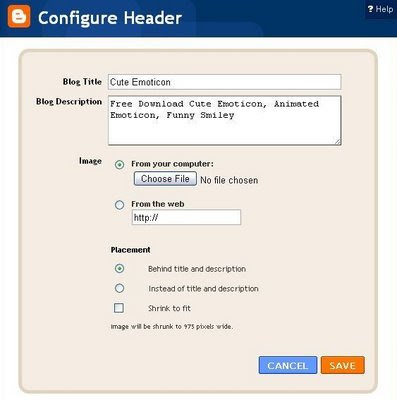
How to Upload?

- Download xml file and save. Click download link above. Remember to Save, no need to open.
- Open your dashboard, go to Layout > Edit HTML
- Click Upload, choose your saved xml file, and then save


Navigation Menu Setting

Open Edit HTML, find these code below. Replace to your own link and anchor text

<div class='navbarleft'>
<ul id='nav'>
<li><a href='http://your-link-here'>Shirt</a></li>
<li>
<a href='http://your-link-here'>Skirt</a>
<ul>
<li>
<a href='http://your-link-here'>Skirt #1</a>
<ul>
<li><a href='http://your-link-here'>Green</a></li>
<li><a href='http://your-link-here'>Red</a></li>
<li><a href='http://your-link-here'>Blue</a></li>
</ul>
</li>
<li><a href='http://your-link-here'>Skirt #2</a></li>
<li><a href='http://your-link-here'>Skirt #3</a></li>
<li><a href='http://your-link-here'>Skirt #4</a></li>
<li><a href='http://your-link-here'>Skirt #5</a></li>
</ul>
</li>
<li><a href='http://your-link-here'>Hat</a></li>
<li><a href='http://your-link-here'>Pampers</a></li>
<li><a href='http://your-link-here'>Socks</a></li>
<li><a href='http://your-link-here'>Onesie</a></li>
</ul>
</div>

So glad to receive any response, bug report, and suggestion. Many thanks for not removing credit link
-------------------------------------------------
THE CONTENTS OF THIS TEMPLATE IS MADE BY CEBONG IPIET.
PLEASE BE RESPECTFUL AND DO NOT REMOVE CREDIT FOOTER LINK WITHOUT MY PERMISSION.
YOU ARE ALLOWED TO DISTRIBUTE BUT NOT ALLOWED TO ADD ANY LINK ON FOOTER

Jun 20, 2009

How to Change Header Through Page Element?

If you use free template, of course there are so many same template with yours. So how to make it unique? You can change header background template with your own unique header. How to? Here's how to configure header on your blog through page element.

- Go to Layout > Edit HTML, find header css code. For example
#header-wrapper {
background:#FFFFFF;
width:920px;
height:90px;
margin:0 auto 0px;
}

It means, header size on your template is width 920 pixel and height 90 pixel. Now you have known your header size.

- Create your own header, size width 920 pixel and height 90 pixel using image editing software such as Photoshop, Corel Draw, Inkscape

- Go to Layout > Page Element
- Click Edit on Header Section and this form will appear


- Click Choose File from your computer, pick your header image that you've created before
- After upload finish, image header will appear

- There are two placement option. If you want header title and description text keep appear, choose Behind title and Description , if you want image header wrap header title, choose Instead of title and description
- Save

Blue Glide

Introducing my new blogger template, Blue Glide Blogger Template. This template has glide feature for image gallery slideshow. Suitable for personal, portfolio, photo blog. Work on major browser including IE. Here's the screenshoot.


You can preview and download it freely

READ THIS INSTRUCTION SETTING CAREFULLY

How to Upload?

- Download xml file and save. Click download link above. Remember to Save, no need to open.
- Open your dashboard, go to Layout > Edit HTML
- Click Upload, choose your saved xml file, and then save

Glider Setting

- Do not preview before set up glider content. If you preview before fill glider content, there's a warning, Content doesn't exist
- Go to Page Element
- Click edit on Glider Content widget
- Copy these code below and paste to widget, save

<div class="glidecontent">
<div class="glidemeta">
<h2><a href="http://YOUR-DESTINATION-LINK-HERE" title="HOVER-TITLE">TITLE-TEXT</a></h2>
your summary/description here ...</div>
<a href="http://YOUR-DESTINATION-LINK-HERE"> <img width="620" src="https://blogger.googleusercontent.com/img/b/R29vZ2xl/AVvXsEi0aL6z2ZeHK2V6ODFFhtZ0eywy16xtlis81MDJkfo-TNzTQ-mfiYNjrl1GLWE-UdRJaDLhnIB8csFirDwePzUy2sGXMd5fjwdbn2WT3flj_fFGe5Bo0U-ZbTTrvIGUQSs4Ycp_ez5b_mc/s1600/joecat.jpg" height="220"/> </a>
</div>

<div class="glidecontent">
<div class="glidemeta">
<h2><a href="http://www.ipietoon.com" title="HOVER-TITLE">Free Blogger Template</a></h2>
Ipietoon provide free blogger template, blogger trick and tips, design resources</div>
<a href="http://www.ipietoon.com"> <img width="620" src="https://blogger.googleusercontent.com/img/b/R29vZ2xl/AVvXsEiM5Nahp1ycCXTfLTqbJdbvwsAO5FW96kodHjUe20yaKW-slFSriJZf9LDCmLuTbJCmq-tYSyB3r9rpw1jwurwWbfz6D3ICq3IzJOvkQUbY6TmAEWtT8r3P5tIwvP9QEMARTDySsqBCOnc/s1600/meanbabies.jpg" height="220"/> </a>
</div>
You can see the structure

If you wanna add three image, copy these code three times. Recommended image size is 620x220 pixel

<div class="glidecontent">
<div class="glidemeta">
<h2><a href="http://YOUR-DESTINATION-LINK-HERE" title="HOVER-TITLE">TITLE-TEXT</a></h2>
your summary/description here ...</div>
<a href="http://YOUR-DESTINATION-LINK-HERE"> <img width="620" src="https://blogger.googleusercontent.com/img/b/R29vZ2xl/AVvXsEi0aL6z2ZeHK2V6ODFFhtZ0eywy16xtlis81MDJkfo-TNzTQ-mfiYNjrl1GLWE-UdRJaDLhnIB8csFirDwePzUy2sGXMd5fjwdbn2WT3flj_fFGe5Bo0U-ZbTTrvIGUQSs4Ycp_ez5b_mc/s1600/joecat.jpg" height="220"/> </a>
</div>
So glad to receive any response, bug report, and suggestion. Many thanks for not removing credit link
-------------------------------------------------
THE CONTENTS OF THIS TEMPLATE IS MADE BY CEBONG IPIET.
PLEASE BE RESPECTFUL AND DO NOT REMOVE CREDIT FOOTER LINK WITHOUT MY PERMISSION.
YOU ARE ALLOWED TO DISTRIBUTE BUT NOT ALLOWED TO ADD ANY LINK ON FOOTER

Jun 14, 2009

Why Date Not Show Up on Post?

"Why the date not show up on my blog post?"
Have this ever happened to you? Actually this is simple problem. Template designer usually set this date header not display considering its appearance. How to solve this problem? There's two alternative solving problem.

1. Check HTML Code
First, you have to check html code, as I said, the author could be set date display none. Go to EDIT HTML. If there's code below


h2.date-header {
margin: 1.5em 0 .5em;
display: none;
}

Delete display: none;

And then Save. Preview it and date will appear.


2. Change Timestamp Format Setting

Even the author set not to display date header, usually they still set to display timestamp. Actually we can this tricky setting.
Go to Setting > Formatting > Timestamp Format
There's many choice of timestamp format setting. Choose timestamp that show date, voila, your date will appear.

Paper Girl

As its name, paper girl blogger template is my another girly blogger template. Dominated pink and baby blue color, with pink paper stuff, this template suitable for girl's personal blog/diary blog. Here's the screenshoot


you can PREVIEW and DOWNLOAD 

How to change blogger template?
  1. Click on download link
  2. Save to your desktop (save, do not open)
  3. Open dashboard, go to layout
  4. Click Edit HTML
  5. Upload downloaded-xml file
  6. Save
-------------------------------------------------
THE CONTENTS OF THIS TEMPLATE IS MADE BY CEBONG IPIET.
PLEASE BE RESPECTFUL AND DO NOT REMOVE CREDIT FOOTER LINK WITHOUT MY PERMISSION.
YOU ARE ALLOWED TO DISTRIBUTE BUT NOT ALLOWED TO ADD ANY LINK ON FOOTER

Jun 7, 2009

Another Way to Change Blogger Template Without Deleting Widget

Fyuh, such a long post title. On my last post, I give trick how to change blogger template without deleting widget. There's same main point, that is copy all widget from current blog to new template. Maybe, some of you not familiar with Notepad ++, a lil bit complicated. Here's another way to edit XML file.
  1. Download new xml template
  2. Save to your desktop. Remember, SAVE no need to open. Some mistake is they open xml file in browser of course there will be an error warning, because browser not compatible to open xml file
  3. Create new blog. This is trial blog to edit new xml template
  4. Upload your new template to trial blog. How to ? Open Edit HTML, and then upload downloaded xml file
  5. Open your current blog layout
  6. Go to Edit HTML, copy all widget code between <div id='sidebar'>
  7. Open trial blog layout
  8. Go to Edit HTML, paste to trial blog, all copied widget code. Put it between <div id='sidebar'> too
  9. Save
  10. Download and save full template of trial blog
  11. Upload to your current blog layout, and you get new layout without deleting widget

Jun 2, 2009

Baby Cute 3 Column

This is request from Bambie. Baby Cute template three column version. Thanks for your support. You can check this post for two column version.

Preview  |   Download

-------------------------------------------------

THE CONTENTS OF THIS TEMPLATE IS MADE BY CEBONG IPIET.
PLEASE BE RESPECTFUL AND DO NOT REMOVE CREDIT FOOTER LINK WITHOUT MY PERMISSION.
YOU ARE ALLOWED TO DISTRIBUTE BUT NOT ALLOWED TO ADD ANY LINK ON FOOTER
 

Ipietoon - Blog Design and Online Business Blogging Since 2008